Hello everyone, dear students, and welcome to a new and very important lesson in our journey to learn web development! After having learned in the previous lesson what HTML is and its role as the “skeleton” for webpages, and how it integrates with CSS and JavaScript, it’s now time to delve deeper into the details of this structure. Today, we’re going to talk about HTML elements, which are the fundamental building blocks from which every webpage you see on the Internet is constructed.
Imagine you’re building a house. The skeleton of the house is the foundation and the main walls. But this structure needs small, varied bricks to form the rooms, doors, windows, and so on. These bricks are exactly like HTML elements in a webpage. Each element has a specific role, a particular shape, and its own place in the construction.
You might also be interested in: What are the benefits of using HTML5?
What is an HTML Element? And What’s the Difference from a Tag?
In the world of HTML, you might often hear the terms “element” and “tag,” and they might seem similar, but there’s a subtle and very important difference for beginners.
•The Tag: This is the marker we use to define the beginning and end of an element. Tags are written between less-than and greater-than signs (< >). We have an opening tag (for example, <h1>) and a closing tag (for example, </h1>). The closing tag is distinguished by the presence of a forward slash (/) before the tag name.
•The Element: This is everything that extends from the opening tag to the closing tag, including the content within them. In other words, an element is composed of the opening tag + the content + the closing tag.
Let’s take a simple example to clarify the idea:
<h1>This is a main heading</h1>
In this example:
•<h1> is the opening tag.
•</h1> is the closing tag.
•This is a main heading is the content.
•And all of this together: <h1>This is a main heading</h1> is an HTML element.
Understanding this subtle difference will greatly help you understand how to build webpages correctly and logically.
Types of HTML Elements: Not All Bricks Are Alike!
Just as there are different types of bricks in construction (bricks, wood, glass), HTML elements come in different types, and each type has its own characteristics and uses.
1. Normal Elements
These are the most common elements, and they are those that contain content and are located between an opening and a closing tag. The examples we saw previously, such as <h1> and <p>, are normal elements. These elements can contain text, images, or even other HTML elements within them.
Example:
<p>This is a simple text paragraph.</p>
•<p>: The opening tag that tells the browser that what follows is the beginning of a paragraph.
•This is a simple text paragraph.: The textual content of the paragraph.
•</p>: The closing tag that tells the browser that the paragraph has ended.
2. Empty Elements
These elements are very special! They do not contain any textual content or other elements within them, and consequently, they do not have a closing tag at all. Their role is usually to insert something specific into the page, rather than to encapsulate content.
• This tag is used to insert a Line Break. Imagine you’re writing text and you want to start a new line without starting a completely new paragraph. This is where comes in. Since it doesn’t encapsulate any content, there’s no need for a closing tag.
Another common example:
<img src="image.jpg" alt="Description of the image">
<img>
This tag is used to insert an image. It’s also an empty element because it doesn’t encapsulate content (the image itself). Instead, we use attributes within the opening tag to specify the image source (src) and its alternative description (alt). We’ll talk about attributes in more detail in future lessons, but the important thing now is to understand that it’s an empty element.
3. Nested Elements
This is the true power of HTML! Nesting refers to the ability of HTML elements to contain other elements within them. This is what allows us to build a hierarchical and organized structure for webpages. Think about the house again: the room contains a window, and the window contains glass. This is how elements nest.
Example:
<div> <h1>Section Title</h1> <p>This is a paragraph inside the section.</p> </div>
•<div>: This is a common tag used to group content. Here, the <div> element contains an <h1> element and a <p> element within it.
•The Golden Rule of Nesting: The element that was opened last must always be closed first. In other words, tags must not be improperly nested. This means that
<div><h1></div></h1>
is an error, and the correct form is
<div><h1></h1></div>
Essential HTML Elements: Get to Know Your New Friends!
Let’s take a look at some of the essential elements indispensable for any webpage, which we mentioned in the previous lesson:
<html>
(The Root Element):
•This is the parent element of everything in an HTML page. All the content of your page, from its head to its foot, must be enclosed by <html> and </html> tags. It defines the beginning and end of the entire HTML document. It’s like the outer frame of the house that contains everything inside.
<head>
(The Document Head):
•This section contains descriptive information about the page that is not directly visible to the user in the browser. Like the page title that appears in the tab, or links to CSS files, or information about character encoding. It’s like the “brain” of the page.
•It’s like the control room of the house, where all the wires and switches that make the house work are located, but they are not part of the visible decor.
<body>
(The Document Body):
•This is the part that contains all the visible content of the webpage. Everything the user sees and interacts with (text, images, links, buttons, lists, tables) must be placed between the <body> and </body> tags. It’s the “body” of the page.
•It’s the living part of the house, where the rooms, furniture, and everything that can be seen and used are located.
<h1> to <h6>
(Headings):
•These tags are used to define headings. <h1> is the most important heading (usually the main title of the page), and <h6> is the least important. The higher the number, the lower the importance. These headings help organize content and make it easier to read and understand, and they are very important for search engines.
•They are like the main and sub-headings in a book, helping the reader understand the content structure.
<p>
(Paragraph):
•This tag is used to define ordinary text paragraphs. It’s the most commonly used element to display long texts on a webpage. Each paragraph must be enclosed by <p> and </p> tags. They are like the paragraphs that make up the chapters of the book.
(Line Break):
•As mentioned earlier, this is an empty element used to insert a new line within a block of text (like a paragraph) without starting a new paragraph. It’s useful when you want to break text into lines but don’t want a large space between them as paragraphs do. It’s like pressing the Enter key in a word processor to create a new line.
Practical Tips and Important Concepts About HTML Elements
Case Sensitivity
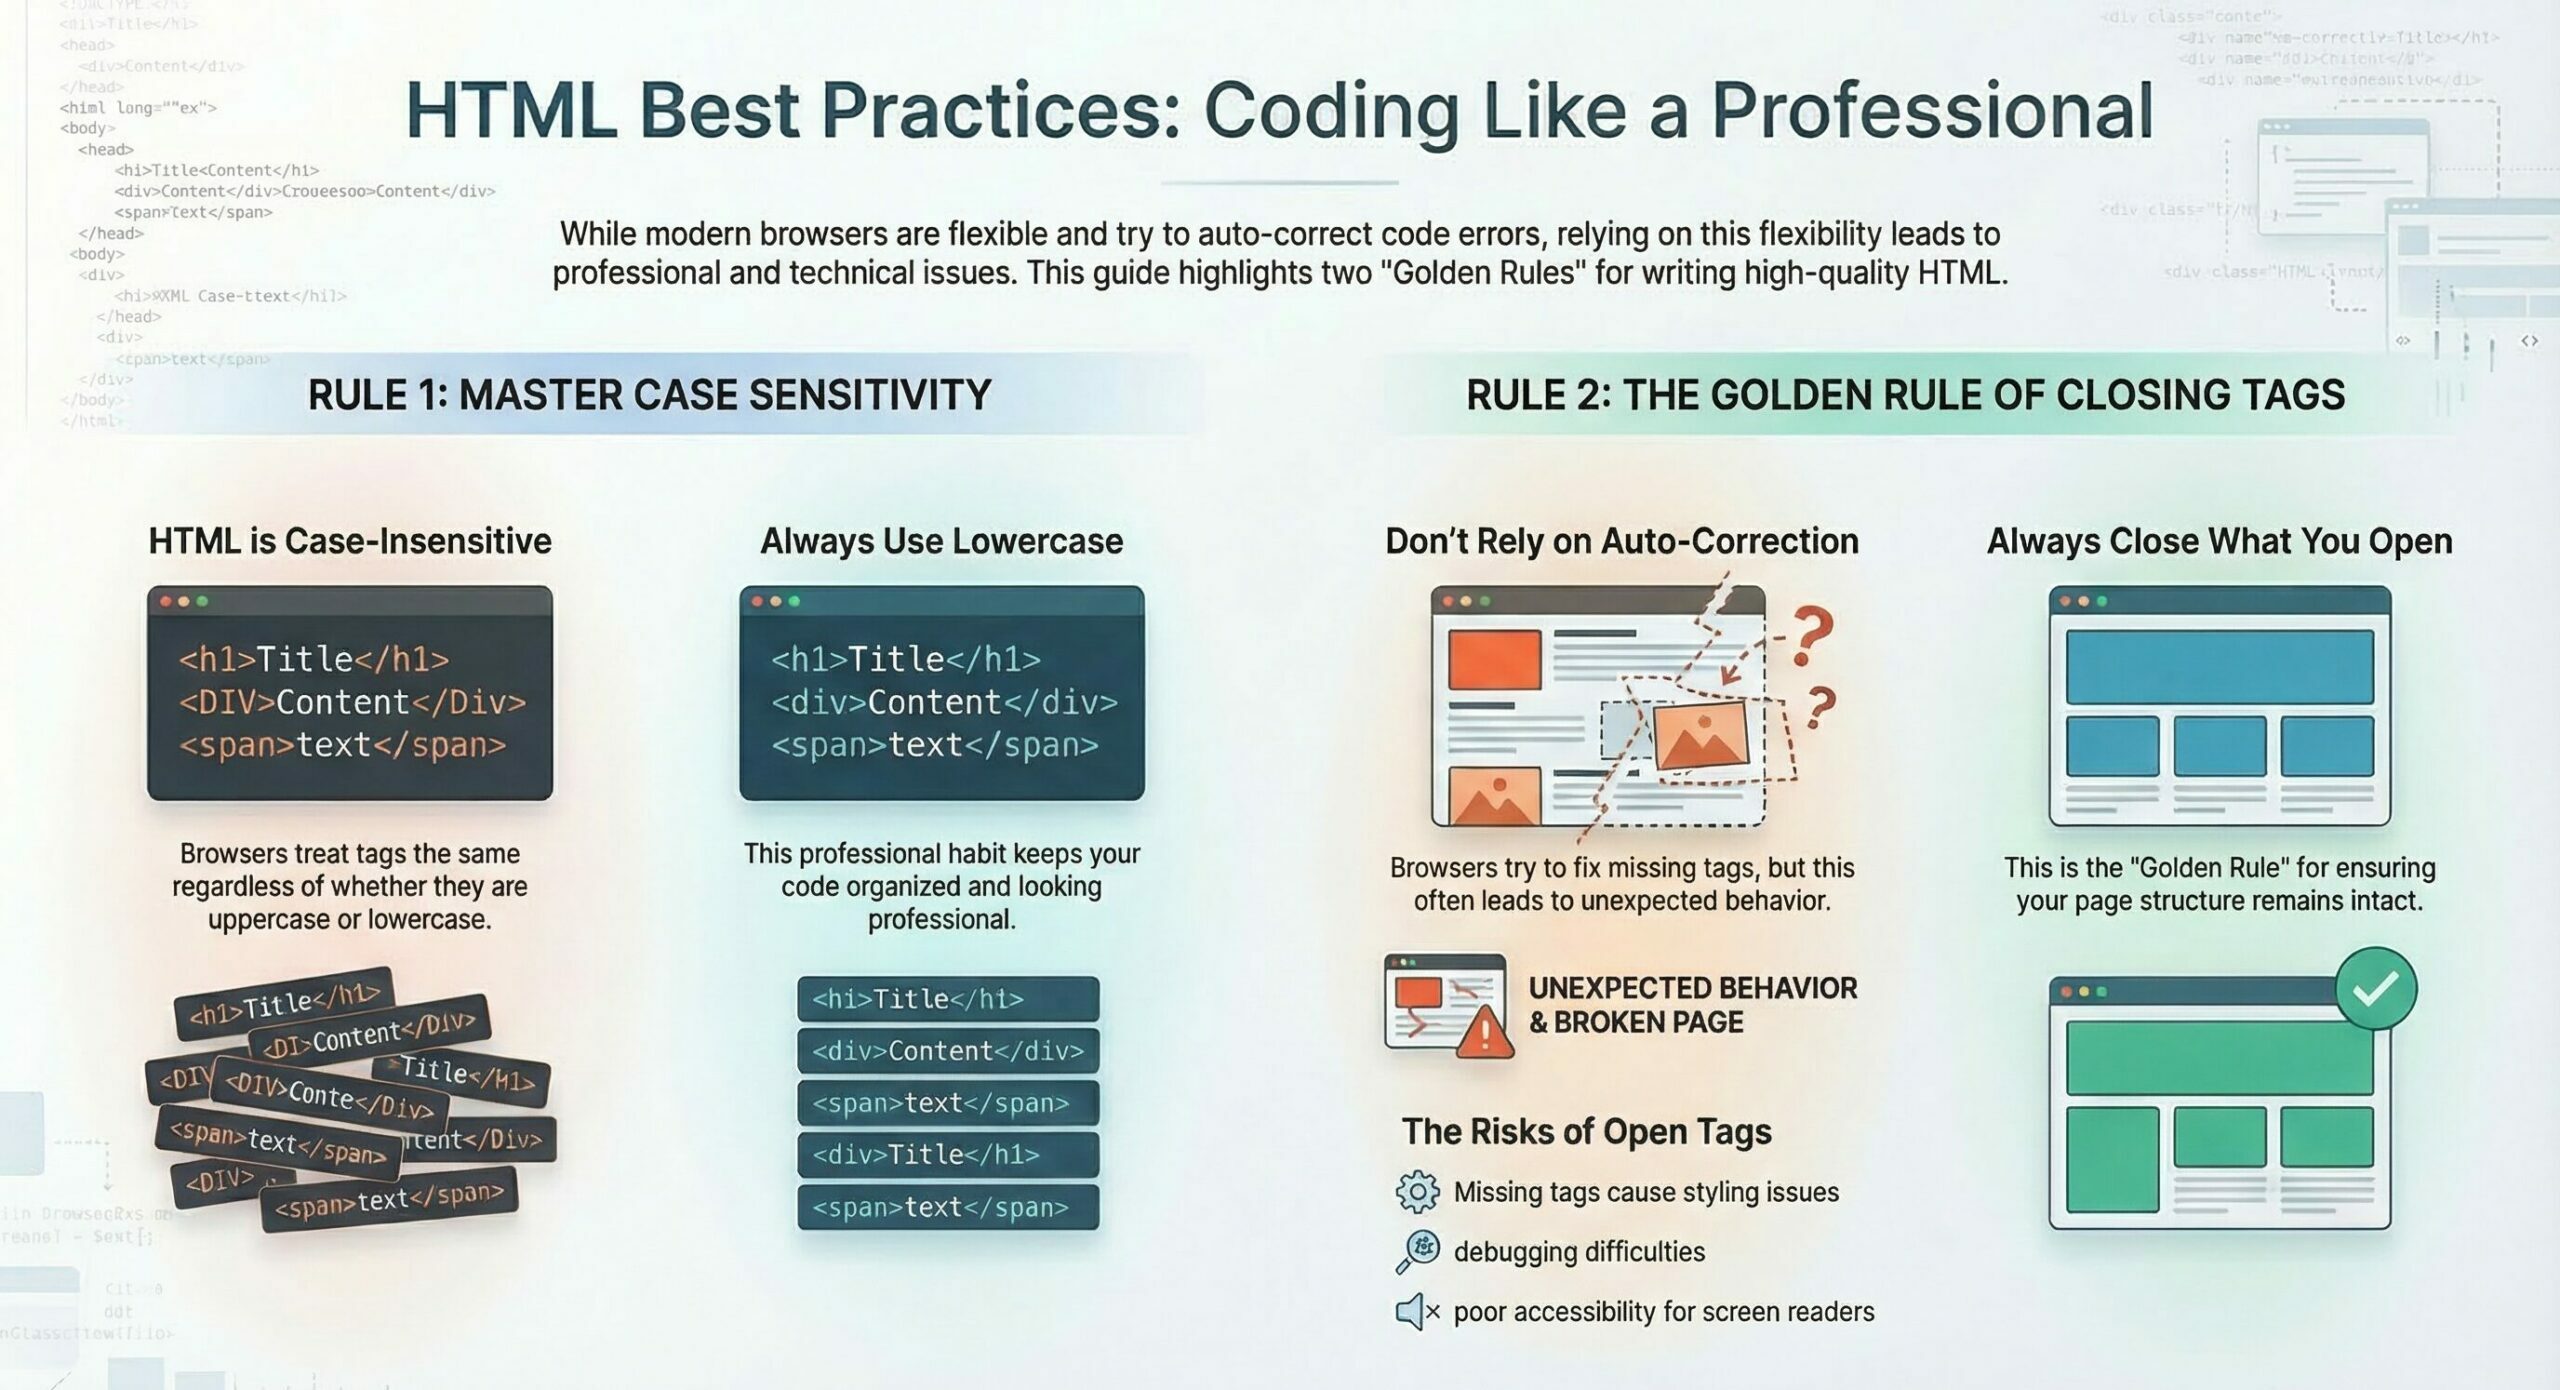
Does it matter if you write <h1> or <H1>? In HTML, there is no case sensitivity. This means that the browser will treat <h1>, <H1>, and <h1 in the same way. However, the W3C organization (World Wide Web Consortium, the body responsible for developing web standards) strongly recommends using lowercase for all tags. This ensures clean code, better readability, and compatibility with stricter standards like XHTML (a type of HTML that requires lowercase).
Teacher’s Tip: Always use lowercase! It’s a very good habit that will make your code professional and organized.
The Importance of Closing Tags
You might sometimes notice that a webpage works correctly even if you forget a closing tag for some elements (like <p>). This is because modern browsers are very smart and try to “correct” errors automatically. But never rely on this! Forgetting closing tags can lead to:
•Unexpected behavior: Your page may not display as expected in different browsers or different versions of the same browser.
•Styling issues: CSS styles may be negatively affected.
•Debugging difficulties: It becomes very difficult to find the cause of the problem when the code is not written correctly.
•Accessibility issues: Screen readers may have difficulty understanding the page structure.
Teacher’s Tip: Always, and I repeat always, close the tags you open. This is a golden rule in HTML.
Practical Example Bringing Everything Together
Let’s apply what we’ve learned in a comprehensive example that illustrates the use of different elements and their structure:
<!DOCTYPE html>
<html lang="en">
   <head>
      <meta charset="UTF-8">
      <meta name="viewport" content="width=device-width, initial-scale=1.0">
      <title>HTML Elements Lesson</title>
   </head>
   <body>
      <h1>Welcome to the HTML Elements Lesson!</h1>
      <p>In this lesson, we are learning about the fundamental building blocks of webpages.</p>
      <p>This is another paragraph containing a line break. The new line starts here.</p>
      <div>
         <h2>Importance of Nested Elements</h2>
         <p>Nested elements help us build an organized and clear structure for the webpage.</p>
         <p>Each element has its role, and we must close it correctly.</p>
      </div>
      <p>Thank you for following the lesson.</p>
   </body>
</html>
Detailed Code Explanation:
<!DOCTYPE html>
Tells the browser that this is an HTML5 document.
<html lang="en">
The root element of the page, specifying English as the content language.
<head>
Contains descriptive information about the page.
<meta charset="UTF-8">
Specifies the character encoding for correct display.
<meta name="viewport" content="width=device-width, initial-scale=1.0">
Makes the page responsive to different screen sizes.
<title>HTML Elements Lesson</title>
The page title that appears in the browser tab.
<body>
Contains all the visible content of the page.
<h1>Welcome to the HTML Elements Lesson!</h1>
A main heading for the page, which is a normal element.
<p>In this lesson, we are learning about the fundamental building blocks of webpages.</p>
A normal text paragraph.
<p>This is another paragraph containing a line break. The new line starts here.</p>
A text paragraph containing an empty element to create a new line within the same paragraph.
<div>
A normal element used to group content, and it contains nested elements here.
<h2>Importance of Nested Elements</h2>
A level two subheading, nested within the <div>.
<p>Nested elements help us build an organized and clear structure for the webpage.</p>
A paragraph nested within the <div>.
<p>Each element has its role, and we must close it correctly.</p>
Another paragraph nested within the <div>.
<p>Thank you for following the lesson.</p>
A concluding paragraph.
How to Apply This Lesson Practically
Just as we did in the first lesson, you can easily apply this code:
1.Open a text editor: Use any text editor you prefer (like VS Code, Notepad++, Sublime Text).
2.Copy the code: Copy the complete code from the practical example and paste it into the editor.
3.Save the file: Save the file as elements_lesson.html (or any name you prefer) and make sure to choose the .html extension and that the encoding is UTF-8.
4.Open in the browser: Simply double-click on the saved file, and it will open in your default web browser. You’ll see your new page with all the elements we’ve learned!
Try changing the texts, adding more paragraphs, or even trying to delete a closing tag to see how the browser behaves (for learning purposes only, then put it back!). Experimentation is the best teacher.
Why is Understanding HTML Elements So Important?
Understanding HTML elements is the key to building any webpage. It’s the foundation upon which you build everything else. When you understand the role of each element, how they nest, and when to use empty elements, you lay a solid foundation for your web development skills.
This understanding will enable you to write clean, organized, and easy-to-maintain code, which is what distinguishes professional developers. Always remember that HTML is the language that gives content meaning and structure, and it’s the first step towards creating exceptional web experiences.
Keep practicing, and don’t hesitate to ask questions. The world of the web awaits your creations! Good luck with your learning journey!
Summary:
HTML elements are the basic building blocks used to structure and organize content on web pages. They define parts of a page such as headings, paragraphs, images, and links.
A tag is the markup symbol that defines the beginning or end of an element (for example <h1> or </h1>).
An element is the complete structure that includes the opening tag, the content, and the closing tag (for example <h1>Main Title</h1>).
Normal elements are the most common type of HTML elements. They contain an opening tag, content, and a closing tag. Examples include <p> for paragraphs and <h1> for headings.
Nested elements are HTML elements placed inside other elements to create a hierarchical structure. For example, a heading inside a <div> element.
The element that is opened last must be closed first. This ensures the correct hierarchical structure of the HTML document.